


OWNER'S GUIDE · WRITTEN FROM OUR SUPPORT INBOX
Stickers are the one part of a big build you cannot click apart and redo, and they decide whether a finished model looks factory-fresh or slightly off. They also bring in a regular share of our support email, in four shapes: the sheets seem to be missing, the manual shows a number with no words next to it, the sheet looks far too small, or the sheet arrived damaged. This guide answers all four and adds what we have learned about technique, fixes and long-term care. It is written around our own sets, the Zenith 720S in particular, but most of it applies to any large brick kit.
First, find the sheets
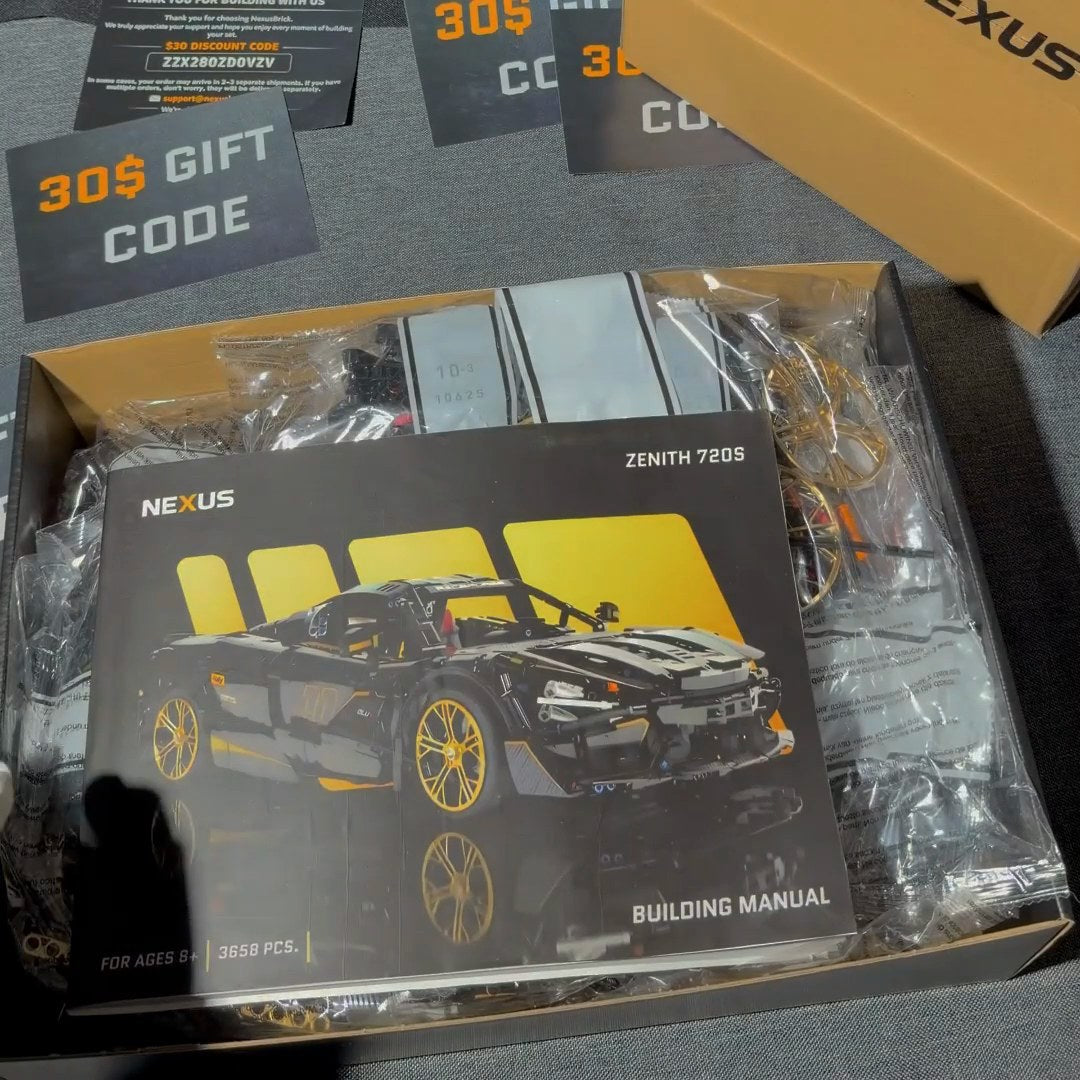
In the Zenith 720S box the two sticker sheets are not in a bag. They travel inside the printed building manual, where they stay flat, and where they are easy to miss. Before you report them missing, hold the manual by its spine and leaf through every page, inside covers included, then check under the cardboard tray and in the corners of the box. Make sure you have both sheets, not one.
If the sheets really are absent, report them like any missing part through our missing-parts form. It happens, and it is one of the sticker problems we fix most often.
Read the callout: a number with no words
Our manuals show each step in pictures rather than words, so a sticker shows up as a small number next to the part it belongs on, with no text around it. The same number is printed beside one of the stickers on your sheet: that sticker goes on that part, at that step. One owner wrote in mid-build to ask what such a number meant: it was sticker number four, and the step was showing him where it goes.
Apply each sticker when its step appears, not at the end. Our own rule fits in one line: apply stickers with clean, dry hands after the step is locked in. That means pressing the parts of that step fully home first, so nothing shifts under your finger. Leaving stickers for the end costs you twice: cabin details get enclosed by later steps, and a sticker that spans two parts only lines up if both are already seated. If a sticker goes on a small loose part, fix that part to a spare plate first so it cannot rock while you press.

Cabin details are easiest to finish while the cabin is still open. Once the beams above it and the body panels go on, anything inside is hard to reach and harder to straighten.
Small is normal: check the sheet against your manual
Sticker sheets are printed to the size of the parts they decorate, so they look tiny next to a box this big. The larger Zenith sheet is about 13 cm long, and the brake stickers look especially small because they are cut to the exact size of the brake parts. One customer asked whether his replacement sheets were the right ones because they looked so small. They were, and a photo beside a ruler settled it.
Do not judge your sheet against photos or videos either. The Zenith's sticker artwork has changed between production runs, so the decals in older pictures, including the ones on this page, may not match yours. The reliable test is your manual: every number in its sticker callouts should appear on your sheets. If one does not, or the sheet belongs to another model (it happens, rarely), send us a photo of the sheet beside the manual page before you apply anything. A sticker that is on cannot go back on the sheet.
What you need
- ✓Clean, dry hands. Skin oil and dust are what stop a sticker gripping.
- ✓Tweezers with fine, smooth tips, to lift stickers off the sheet.
- ✓A thin plastic card, or the flat edge of a brick separator if you have one, to hold, position and press. LEGO's own help page on stickers suggests the separator edge for exactly this.
- ✓A soft, lint-free cloth to wipe each part before its sticker goes on.
- ✓Good light from above, so you can see edges and trapped air.
Applying a sticker straight, step by step
1. Wipe the part. A dry, lint-free cloth removes the dust and finger oil behind most bubbles and lifted corners.
2. Lift it by a corner. Slide the tweezer tips under one corner and peel the sticker off the sheet without touching its adhesive side.
3. Make a handle. Stick that corner lightly to the edge of your card. Now you can hold the sticker flat and hover it over the part to see both at once.
4. Line up the longest edge. Check the gap on each side, then align the longest straight edge of the sticker with the edge of the part or a row of stud holes. The eye notices a tilted edge long before a slightly off-centre one.
5. Touch down, then press from the centre out. Lay the aligned edge down, lower the rest, and press with the card from the middle towards the edges to push the air out.
6. Seal the edges. Run a fingernail or the card around the outline, corners last. Corners are where lifting starts.
For large or clear stickers, a light mist buys you time. LEGO's own help page on stickers suggests lightly spraying the part with warm water and a little mild detergent before applying, so the sticker can slide into place before it grips, and rinsing the parts afterwards. Three cautions from us: mist a loose part only, never the model, because a remote-controlled build is full of motors and cables; try it on one small sticker first, and go back to dry application if it curls or will not grip; and let the part dry completely before you build it in.

Done right: edges parallel to the stud holes, no trapped air, corners flat. A close-up from a finished Zenith 720S of an earlier production run.
Fixing a crooked sticker or a bubble
Act straight away. Like most pressure-sensitive adhesives, sticker glue keeps gaining grip for hours after you press it down, so a sticker that lifts cleanly in the first minute may tear the next morning. Lift it from a corner with the tweezer tips or a fingernail, peel slowly and low, and lay it again. Every lift costs a little grip and picks up a little dust, so make the second attempt the last one.
Push a bubble towards the nearest edge with the card. A bubble that will not move usually has dust or a fibre under it: lift the sticker, wipe the part, and lay it again. If a sticker tears or stretches, do not coax it back into shape, because a stretched print stays distorted. Tell us the sticker number instead (see below).
Removing a sticker
Start at a corner with a fingernail or the tweezer tips, then peel slowly, folding the sticker back over itself rather than pulling it straight up. Keep blades off the visible face of the part: a scratch is permanent, a sticker is not. Skip the heat gun and the hair dryer too. LEGO's care advice warns against drying bricks with a hair dryer and notes that bricks which get very hot can change shape. Most leftover adhesive rolls off under a fingertip, and the rest comes away with lukewarm water and a drop of mild detergent. Never use acetone or nail-polish remover on brick plastic: ABS, the plastic most building bricks are made from, dissolves in acetone and has poor resistance to alcohols as well.
Keeping stickers looking new on display
Dust. Use a soft, dry brush or the cold setting of a hair dryer. Stickers get the dry brush only, never a wet cloth or a soak. Unstickered parts can be washed by hand in water no warmer than 40°C, LEGO's own limit for bricks; electronics only ever get a damp cloth.
Sun. UV light yellows ABS plastic and fades printed colour, stickers included. It is slow: a seven-week sunny-windowsill test published by the fan site BrickNerd showed almost no visible change, while a model the same writer kept near a window for about seven years had its white bricks turn tan on the side facing the glass. Weeks do little; years do the damage. Keep the model out of direct sun.
Heat and handling. A radiator, a hot car or a nearby lamp softens sticker adhesive, and enough heat can deform parts. Lift a finished model by its chassis, not a stickered panel; on a car you drive, press any lifted edge back down before dust gets under it.

Out of direct sun and dusted with a dry brush, a finished model needs very little else.
Missing, torn or wrong sheet: what to send us
A sheet that arrived missing, torn, creased or for the wrong model is handled like any missing part. Use the missing-parts form or write to support@nexusbrick.com with:
- ✓Your order number and the name of the set.
- ✓Which sheet is affected, or the numbers of the stickers you need.
- ✓A photo of the sheet beside a ruler, and one of the manual page with the callout circled.
- ✓If the damage was there when you opened the box, a photo of it and of the packaging.
Sticker sheets are printed for each model, so what we can send depends on the set, and for some older models a sheet is no longer printed. If you spoiled a sticker yourself, write to us anyway with its number. Our missing-pieces guide covers the rest of the replacement process.
Zenith 720S owners: the short version
Two sheets, inside the manual. Lift the small brake stickers with tweezers, not a fingernail. Apply cabin stickers before the cabin closes. Mist loose parts only, never the chassis, which carries the motors, cables and receivers. Check your sheets against the manual's callouts, not against photos. And if the car will be driven as well as displayed, give the stickers a day to settle before its first run. Our Zenith build review covers the stages where builders most often slow down.
Two more sticker questions
Do I have to use the stickers, or can I add them later?
Neither is required. Some builders prefer clean panels and never apply them. If you are undecided, keep the sheets flat inside the manual, away from heat and sun. Exterior stickers can go on after the build; anything inside the cabin or on parts that later steps cover is far easier at its own step.
A sticker is lifting at one corner after a few months. What now?
Brush any dust from under the corner, then press it down firmly with a card and hold it for a few seconds. If it will not stay down, write to us with the sticker number rather than reaching for glue.
NEXUSBRICK
The last details are the ones you see
Zenith 720S: 3,658 pieces, remote drive and steering, motorized scissor doors, electric roof, adjustable ride height and LED headlights. Every review is public, and so is this guide.
See the Zenith 720SRead next: what to do about missing or damaged pieces, the Zenith 720S build review, or our realistic build plan for a 3,000-piece supercar.
LEGO® is a trademark of the LEGO Group, which does not sponsor, authorize or endorse this site; its help pages are cited only as a published source. NexusBrick is an independent brand; our elements are designed for compatibility with standard building-brick systems, and our models are original brick interpretations of automotive forms.


Ostavi komentar
Ovo je web-mjesto zaštićeno sustavom hCaptcha, čija pravila zaštite privatnosti i uvjeti pružanja usluge vrijede.